Effortlessly Configure Webhooks to Automate Media Delivery Webhook provide a seamless way to receive processed media directly to your endpoint as soon as the desired events occur.
Step 1: Log In to the Spyne Console
- Visit the Spyne Console.

Step 2: Access the Developer Hub
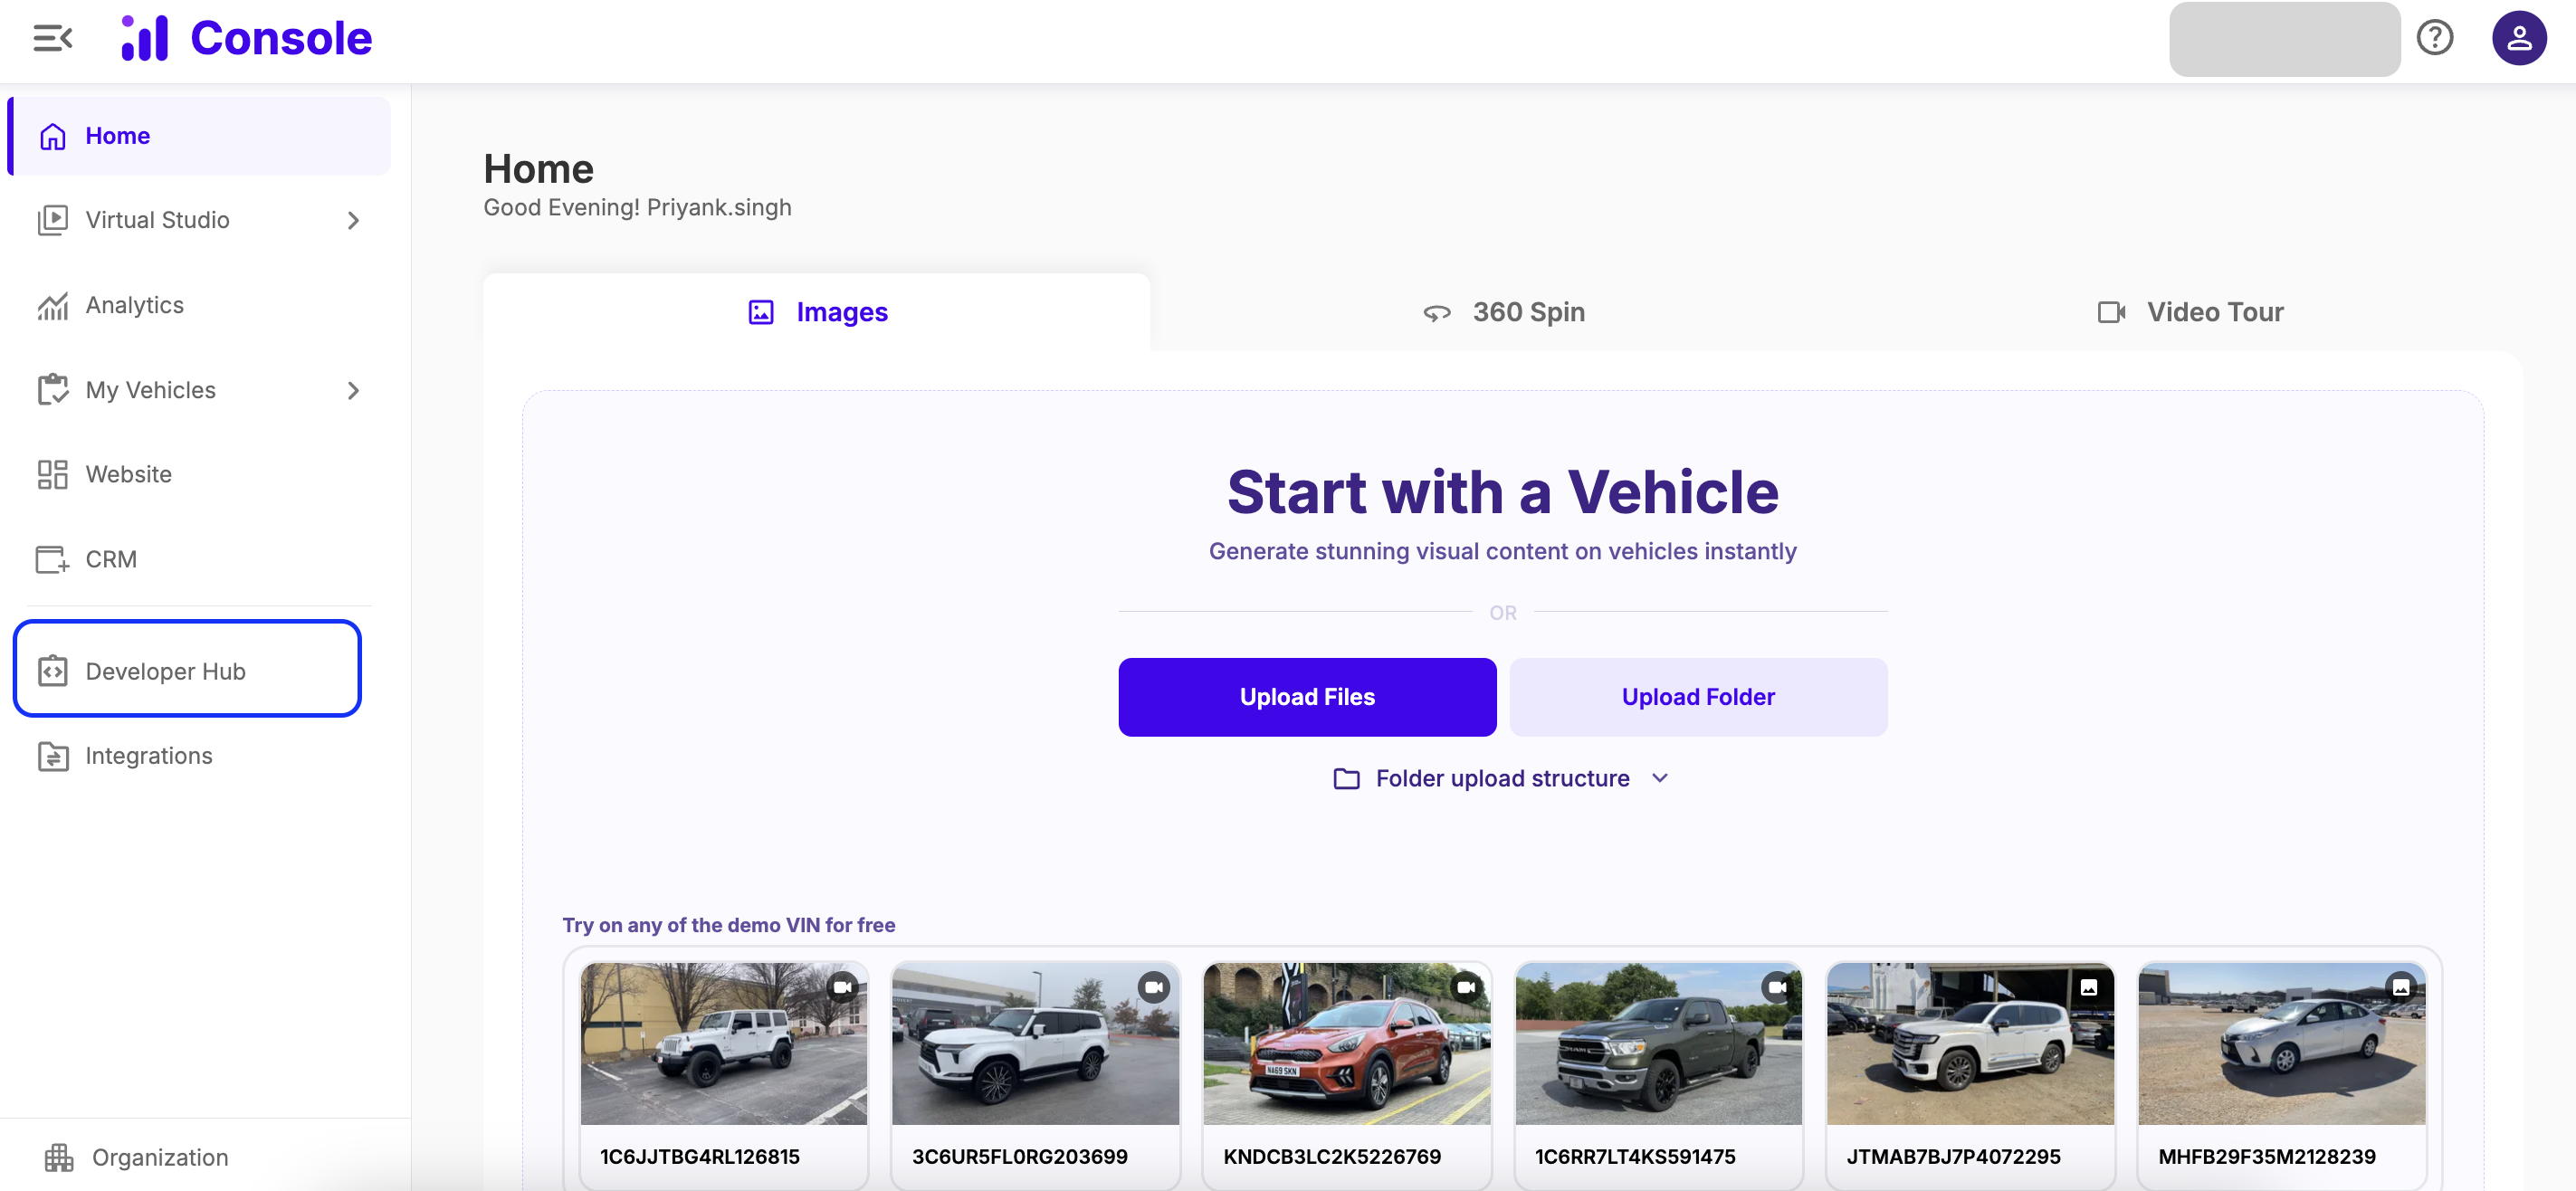
- After logging in, you will land on the main dashboard.
- Locate the Developer Hub option on the left-hand side menu and click on it.

Step 3: Navigate to the Webhooks Tab
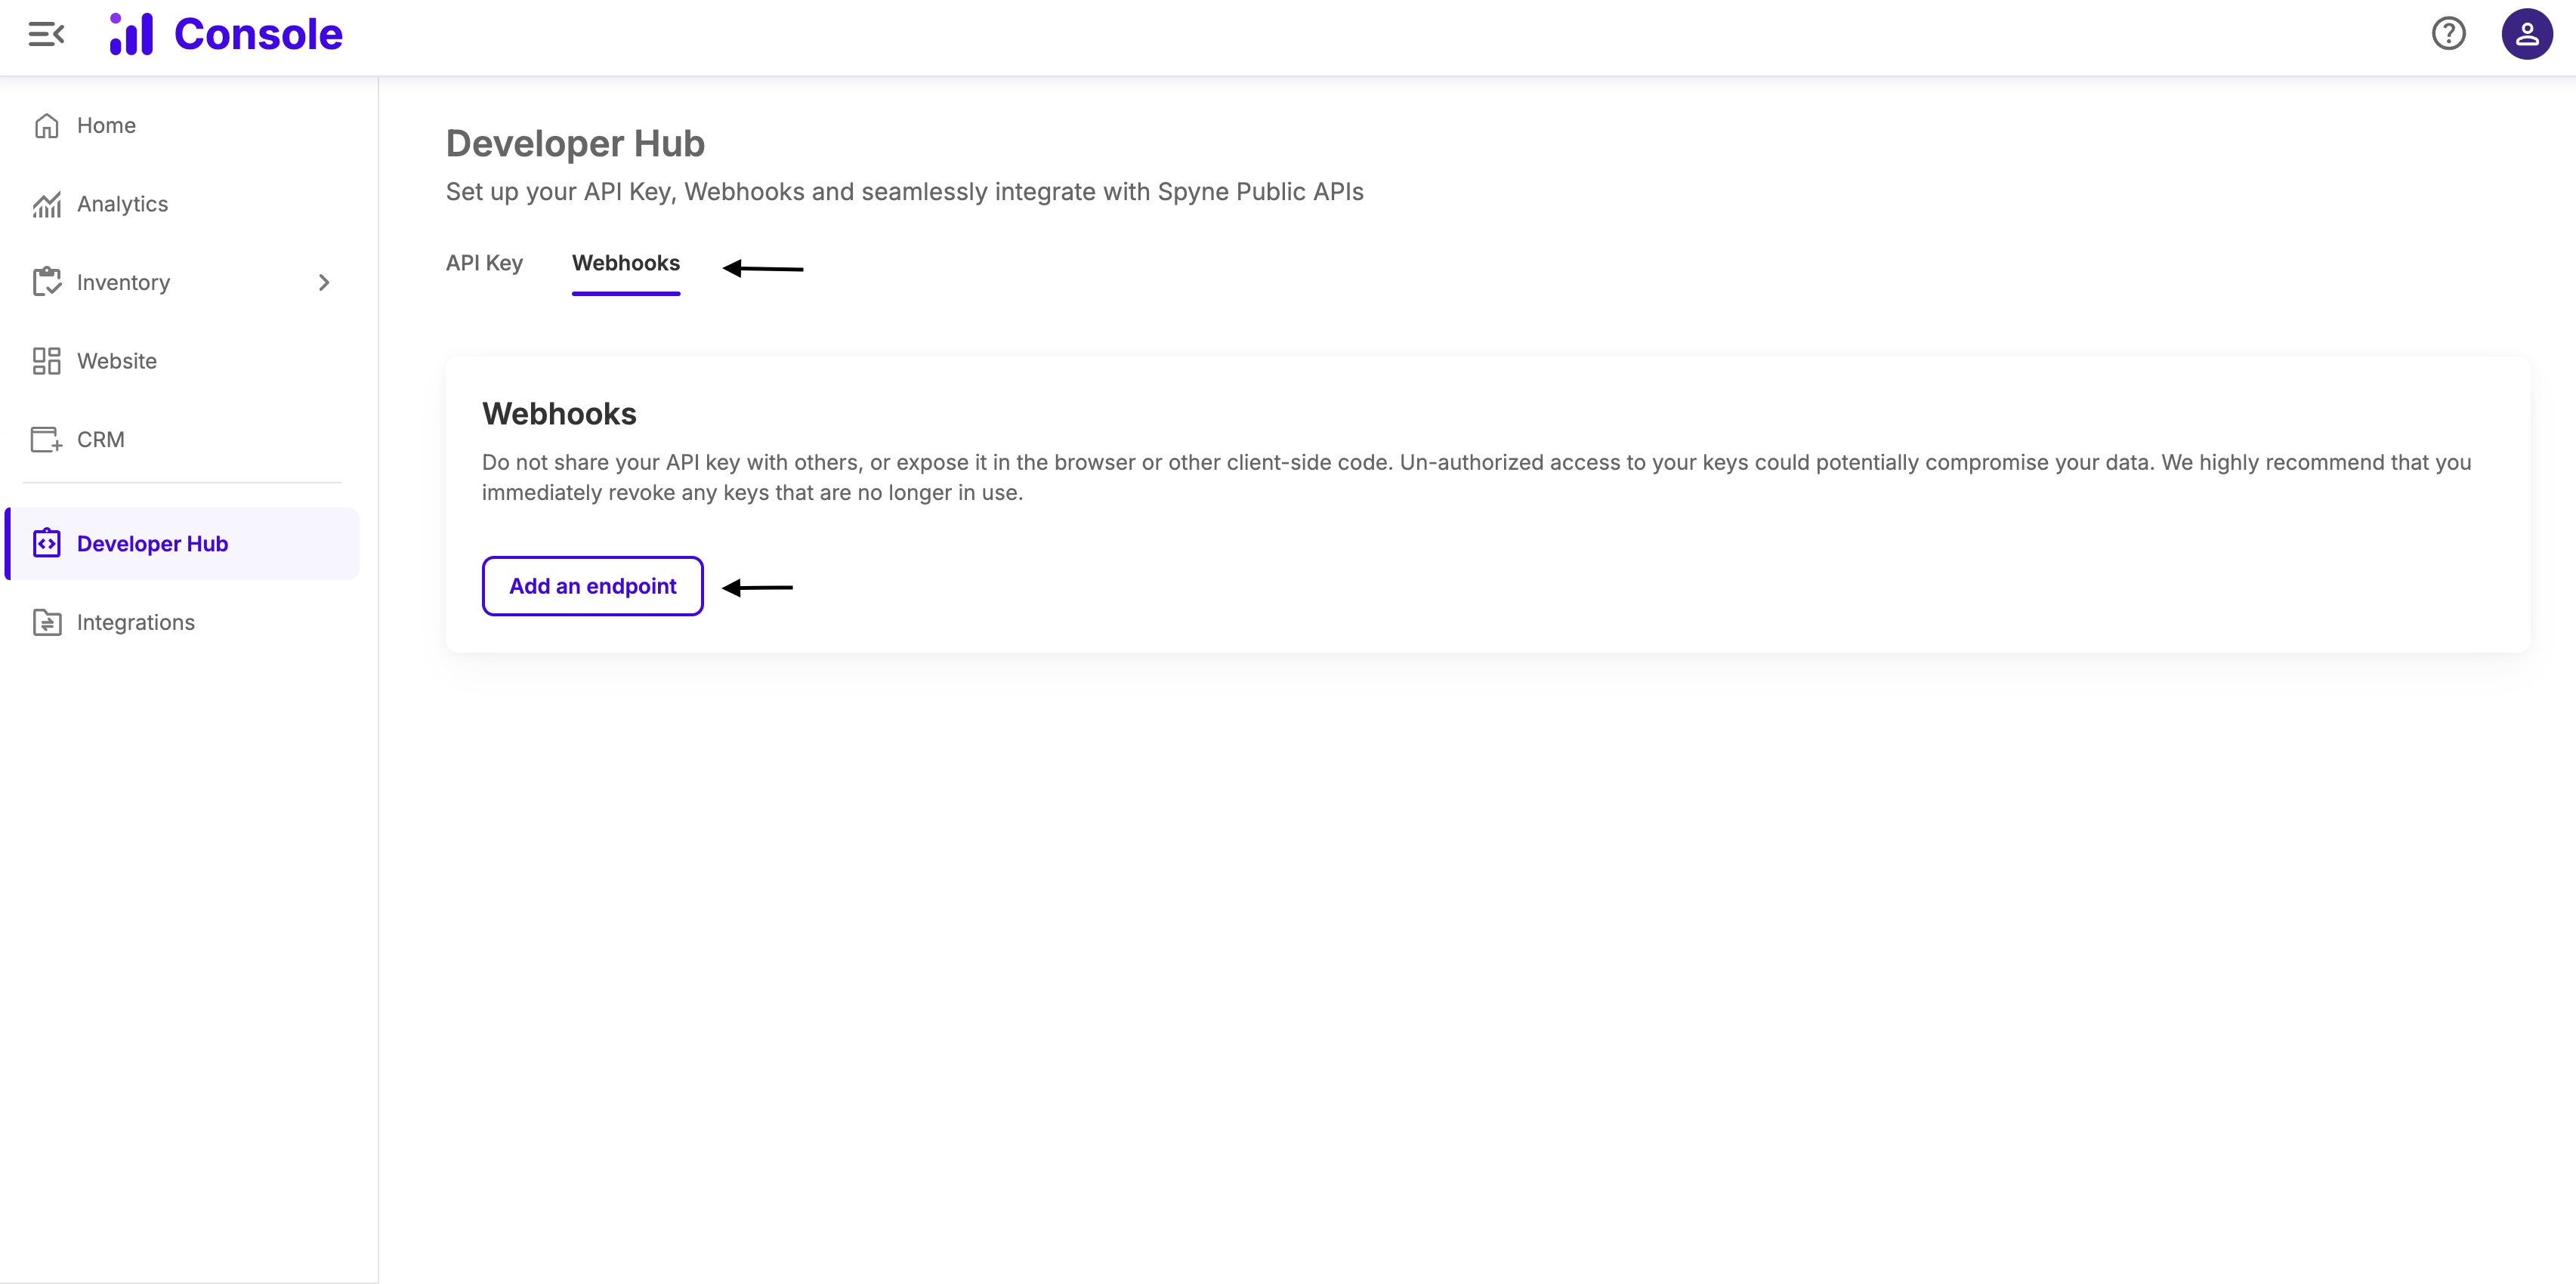
- Within the Developer Hub, the API Key Tab is selected by Default, navigate to Webhooks tab.
- Here, you’ll see an option labeled Create New Endpoint. This action will open the configuration panel for your webhook.

Step 4: Choose Product-Specific Webhook Endpoints
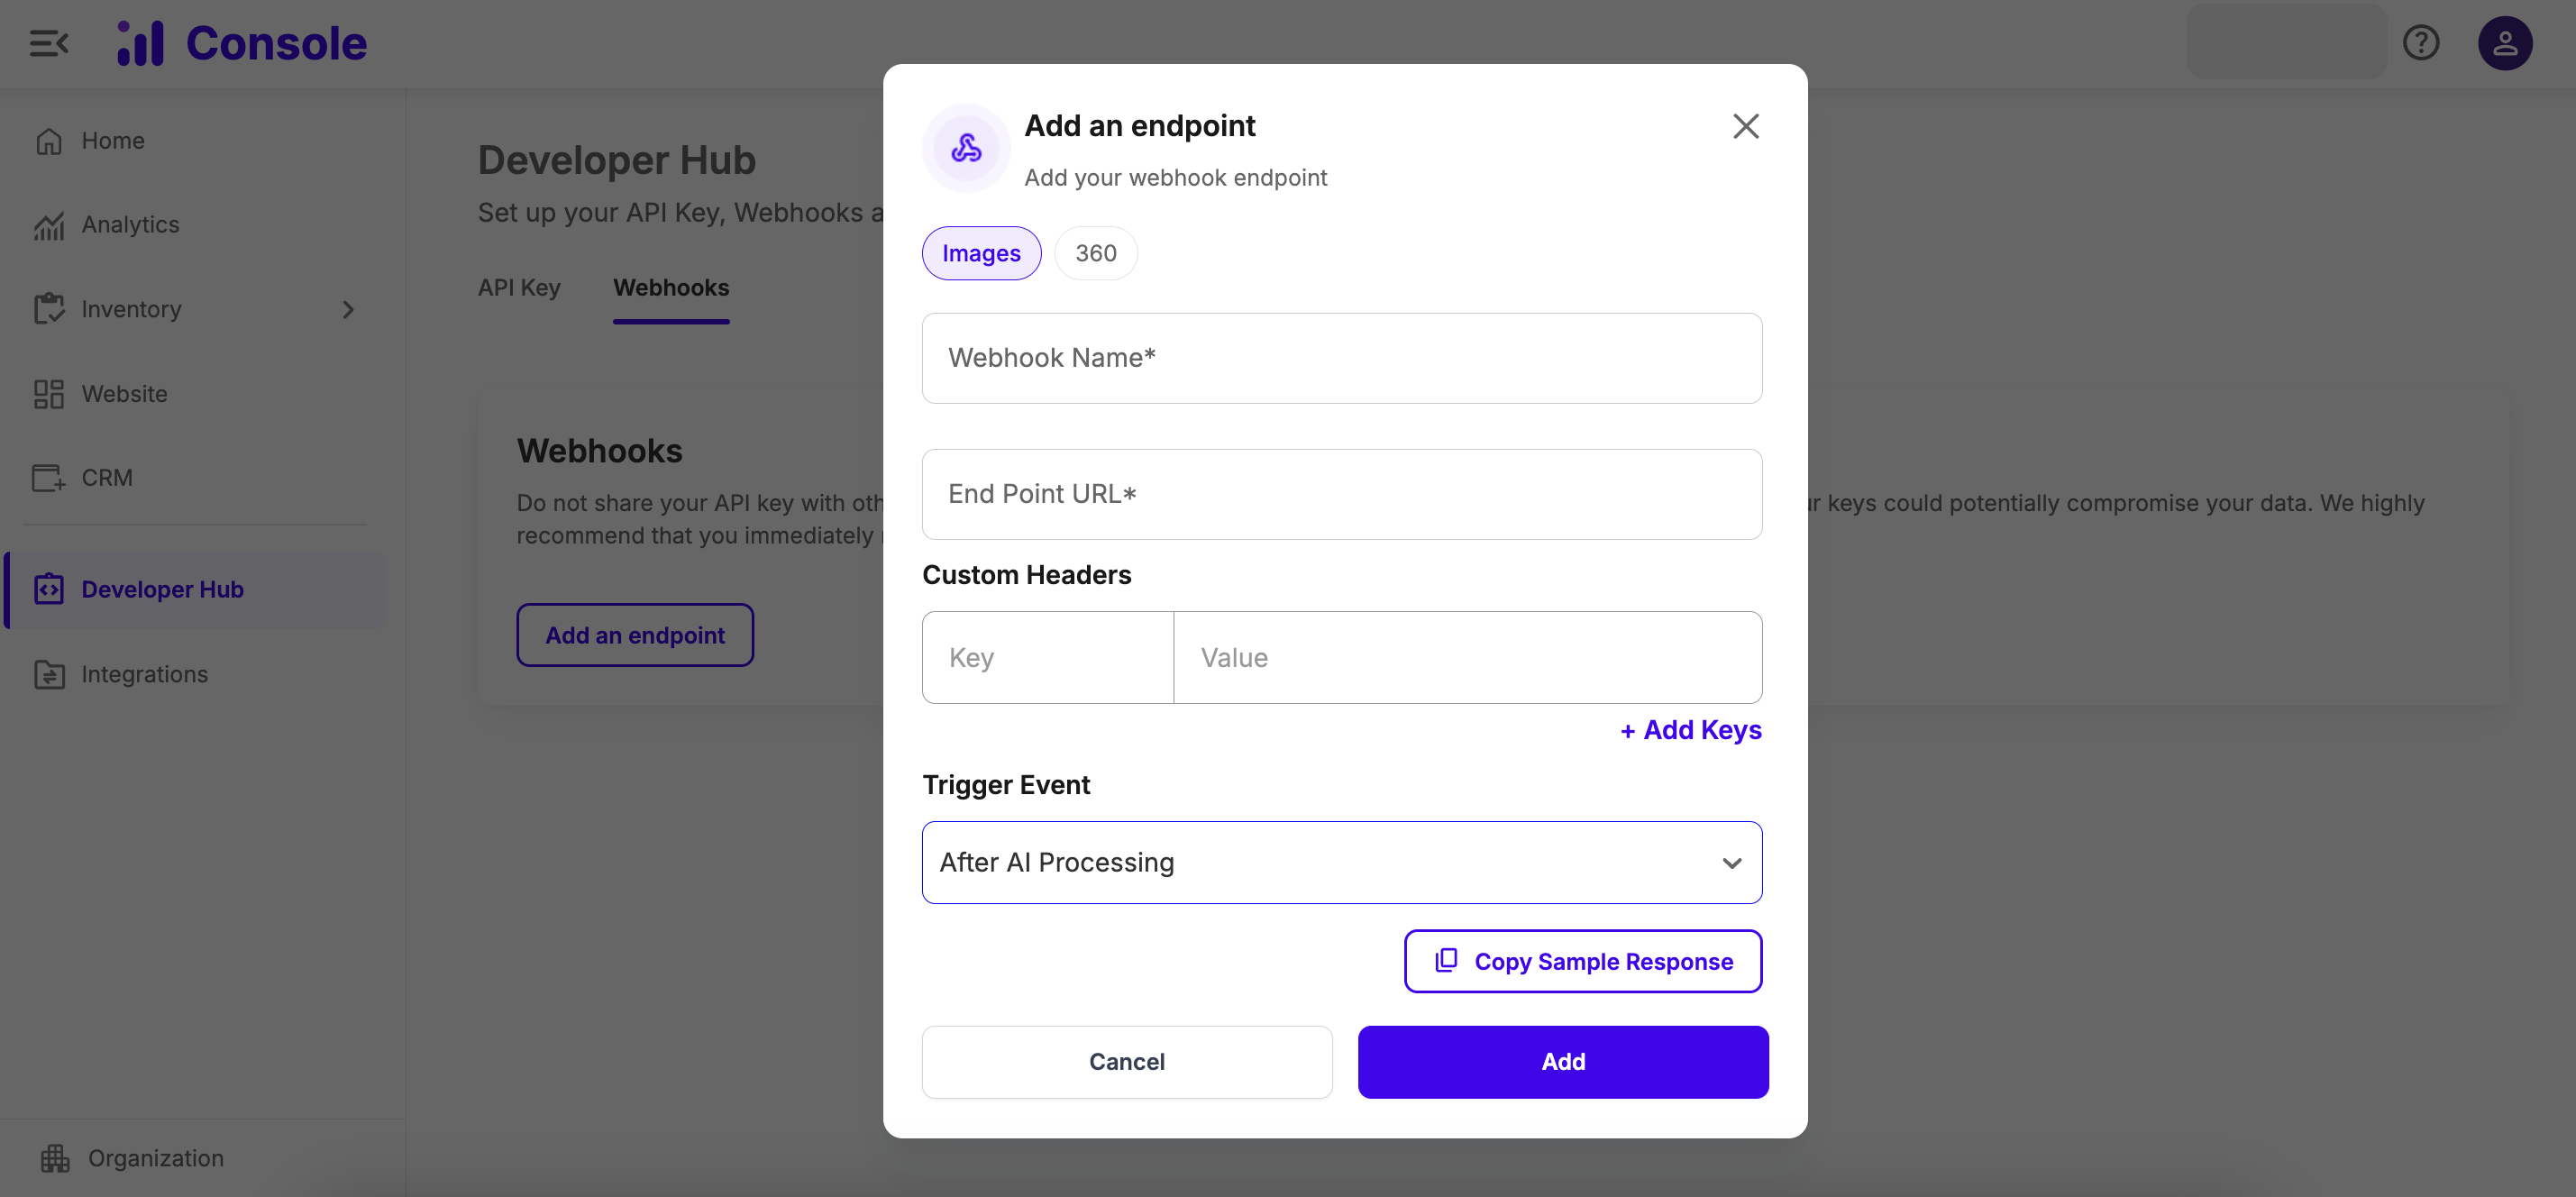
- You will see options to set webhook endpoints.
Note: Webhooks can only be configured for products with an active paid plan.
Step 5: Configure Webhook Details
- Please provide a Name for your webhook to identify it easily.
- Enter the Endpoint URL where the media should be delivered.
- Add custom headers if required for your integration.

Step 7: Select Trigger Events
Choose the event(s) that will trigger the webhook. The available options are:
- After AI Processing: Sends the webhook when the AI generates the product.
- After QC Done: Sends the webhook once the AI-generated product has passed QC verification.
Note: The default selection is After AI Done unless specified otherwise.
Step 8: Save the Configuration
Click Save to complete the setup. Your webhook will now be active and ready to deliver media based on the selected triggers.
Managing Webhooks
- Once the webhooks are created, users will begin receiving processed media at the configured endpoint whenever the selected event(s) occur.
- If you need to deactivate a webhook, simply toggle the corresponding switch, and the webhook will be disabled immediately.
